How to Setup Your Company
How to configure your company information
Finish setting up your company information. To do that, go to Settings > Company Information.
Now check the following:
- Name of your company.
- Country of operation of your business.
- Add your company website URL.
- Add your company logo to display on the menu bar for everyone.
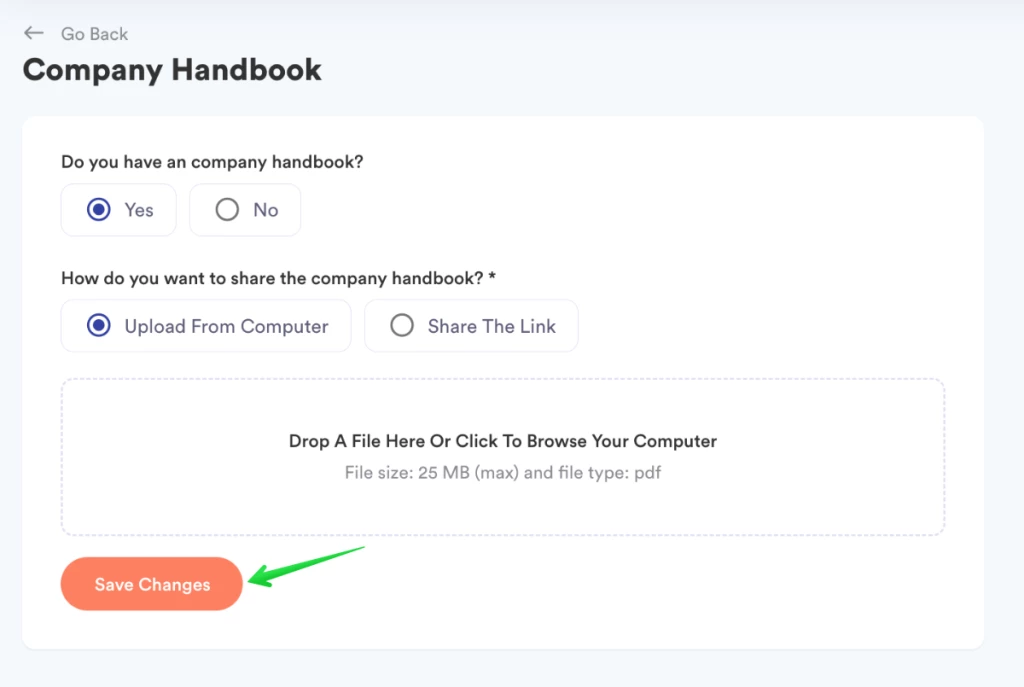
Don’t forget to hit ‘Save Changes’.
How to enable Clock-In/Out from the office or remote
You’ve got the flexibility to control where your team clocks in. To do that, visit Settings > Network Setup.
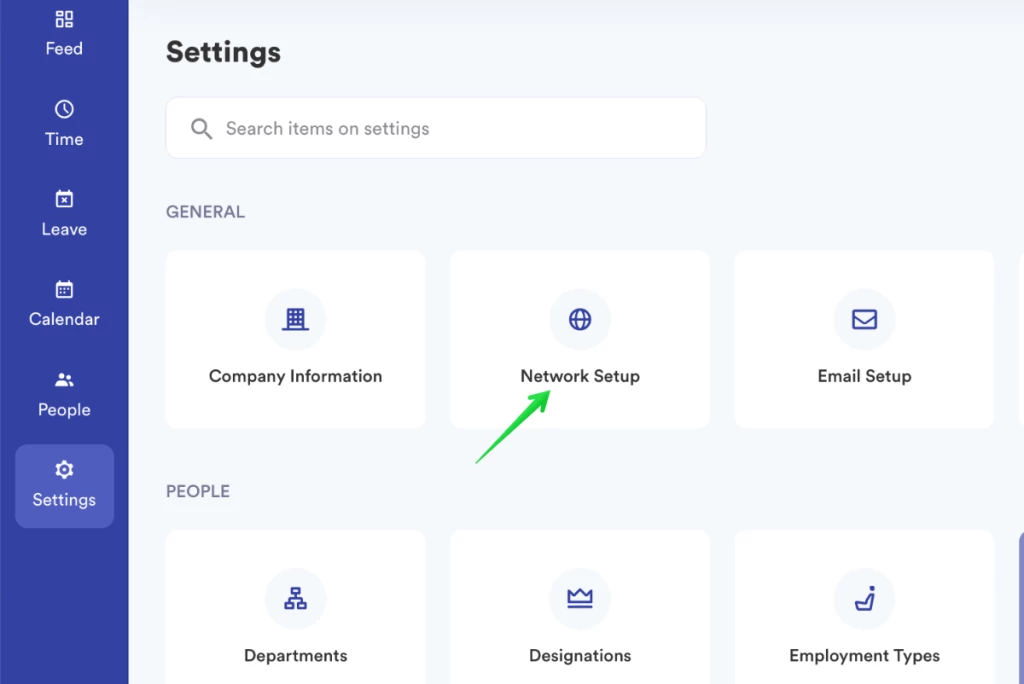
There are two Clock-in and Clock-out options for your team. Which are-
- Physical: By adding whitelisted IP addresses, Clock-In and Clock-Out will only be enabled from these addresses.
- Virtual: Everyone will be able to clock in from anywhere in the world.
Tip: To find out what IP address you are using, visit https://www.whatismyip.com/. If you are still unsure, contact your Internet Service Provider (ISP).
How to add work from home for a specific person

Find that specific person’s profile in the ‘People’ module (you can also use the search bar). Now click the ‘Edit’ option or click on their profile.
Here, you can find the ‘Work From Home Info’ section right beneath the ‘Employment Info’ tab and configure it to your preference.
How to customize the email template
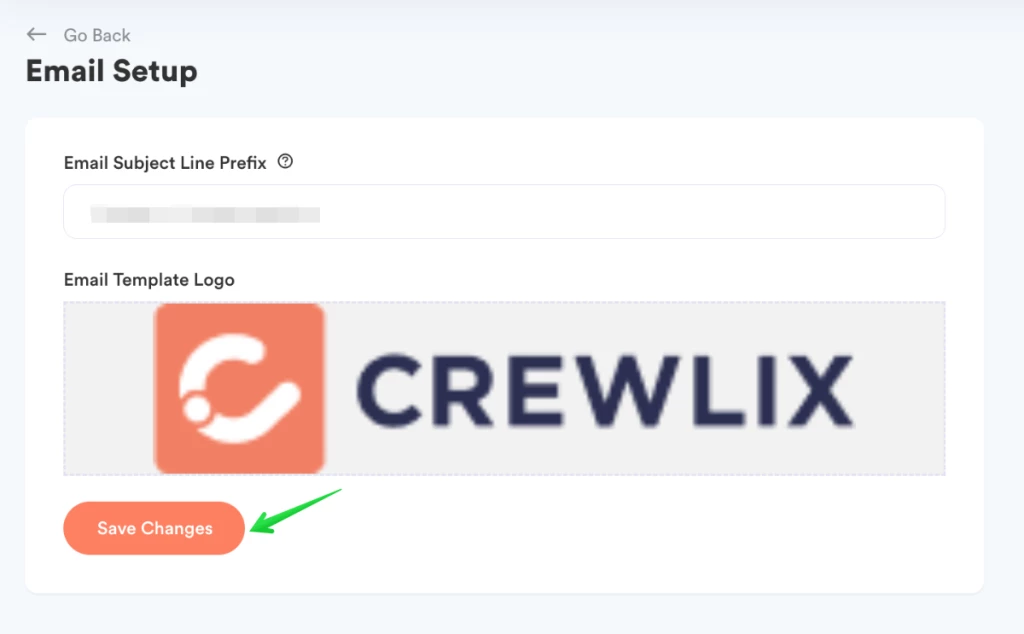
You can personalize the email template that will be used to send out automatic emails from Crewlix, AKA your regular updates over the email. Go to Settings > Email Setup.
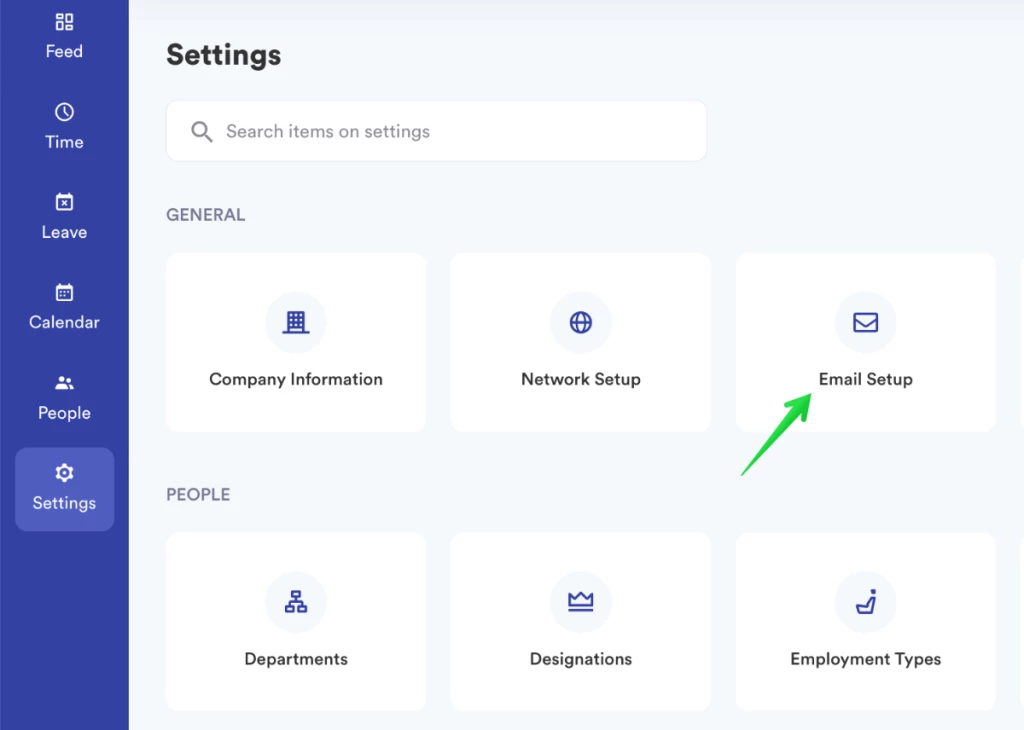
Use a subject line prefix that represents your company or whatever else you like. Also, add a logo for the email template.
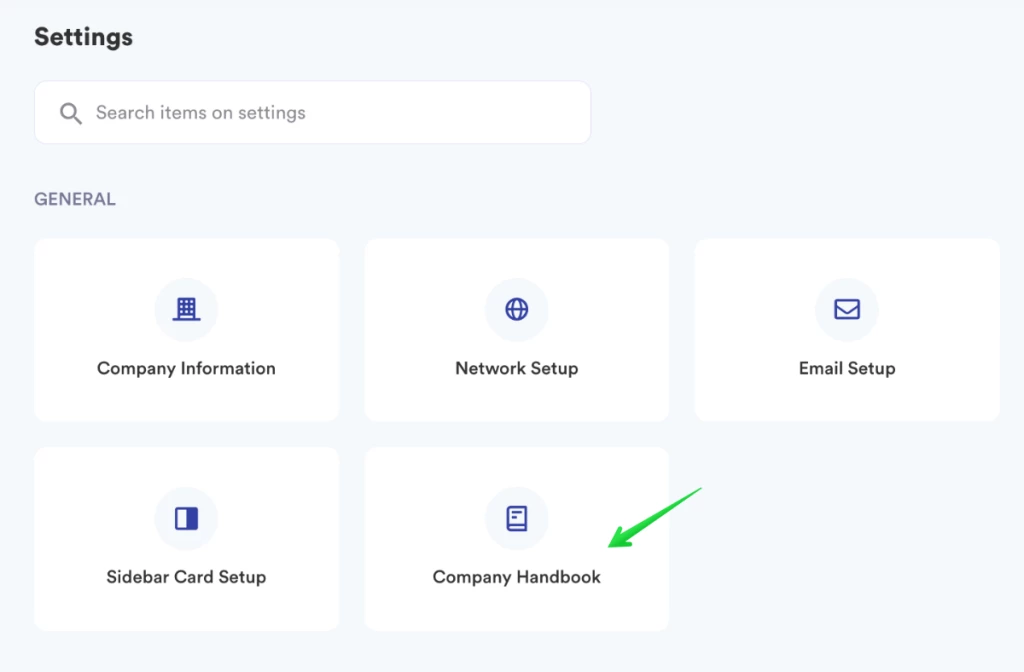
How to add a company handbook
To add your company handbook or relevant document to send out at onboarding, visit Settings > Company Handbook.
Add your company handbook by
- Uploading it directly from your computer.
- Sharing a link to the handbook.
How to create new departments/designation/employment types

You can create Departments, Designations, and Employment types by going to Settings > Departments/Designations/Employment Types respectively.
Follow similar steps for creating new designations and employment types.
How to add a new role and configure permissions
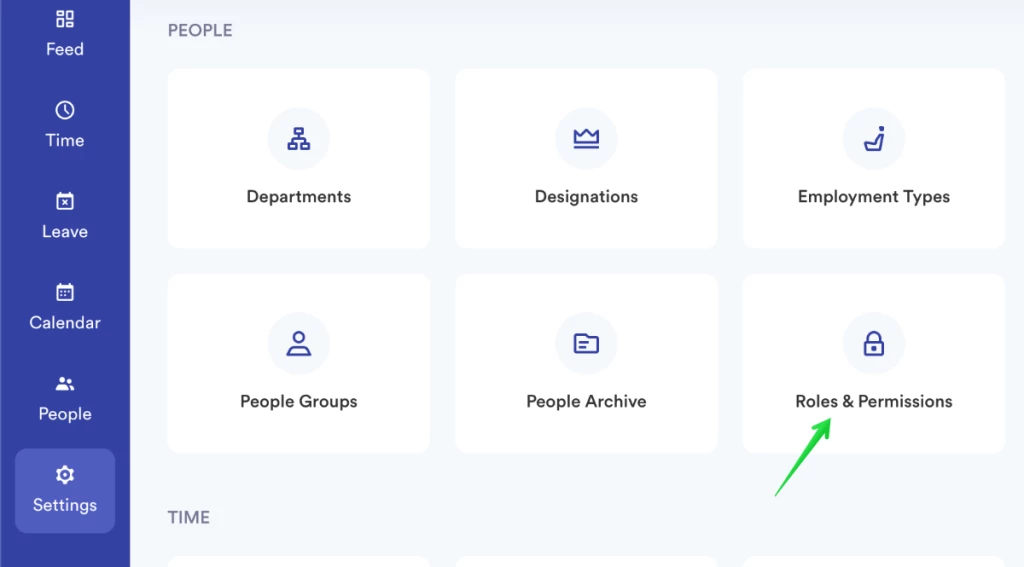
In order to add a completely new role and assign a set of permissions, go to Settings > Roles & Permissions > Add New Role. This is where you add the name of your new role and assign it the permissions you desire.
How to review default roles and permissions
To check this, navigate to Settings > Roles & Permissions.
When profiles are created, they are assigned the role ‘People’ by default; please check all permissions given to the ‘People’ role as default so that no one gets access to areas they are not meant to have.
Click on ‘People’ from the list and visit the ‘Permissions’ tab. Make necessary changes and click ‘Save Changes’ when you’re satisfied.